Out Of Stock
GRANITE SQUARE 630X400MM
- Stock: Out Of Stock
- Model: AC643-024-01
- SKU: AC643-024-01
- MPN: 1
190 samples sold
Product Views: 0
R 44,518.69
Ex VAT: R 38,711.90
More from this brand
R 1,837.70
Ex VAT:R 1,598.00
R 939.84
Ex VAT:R 817.25
R 1,843.80
Ex VAT:R 1,603.30
R 6,618.83
Ex VAT:R 5,755.50
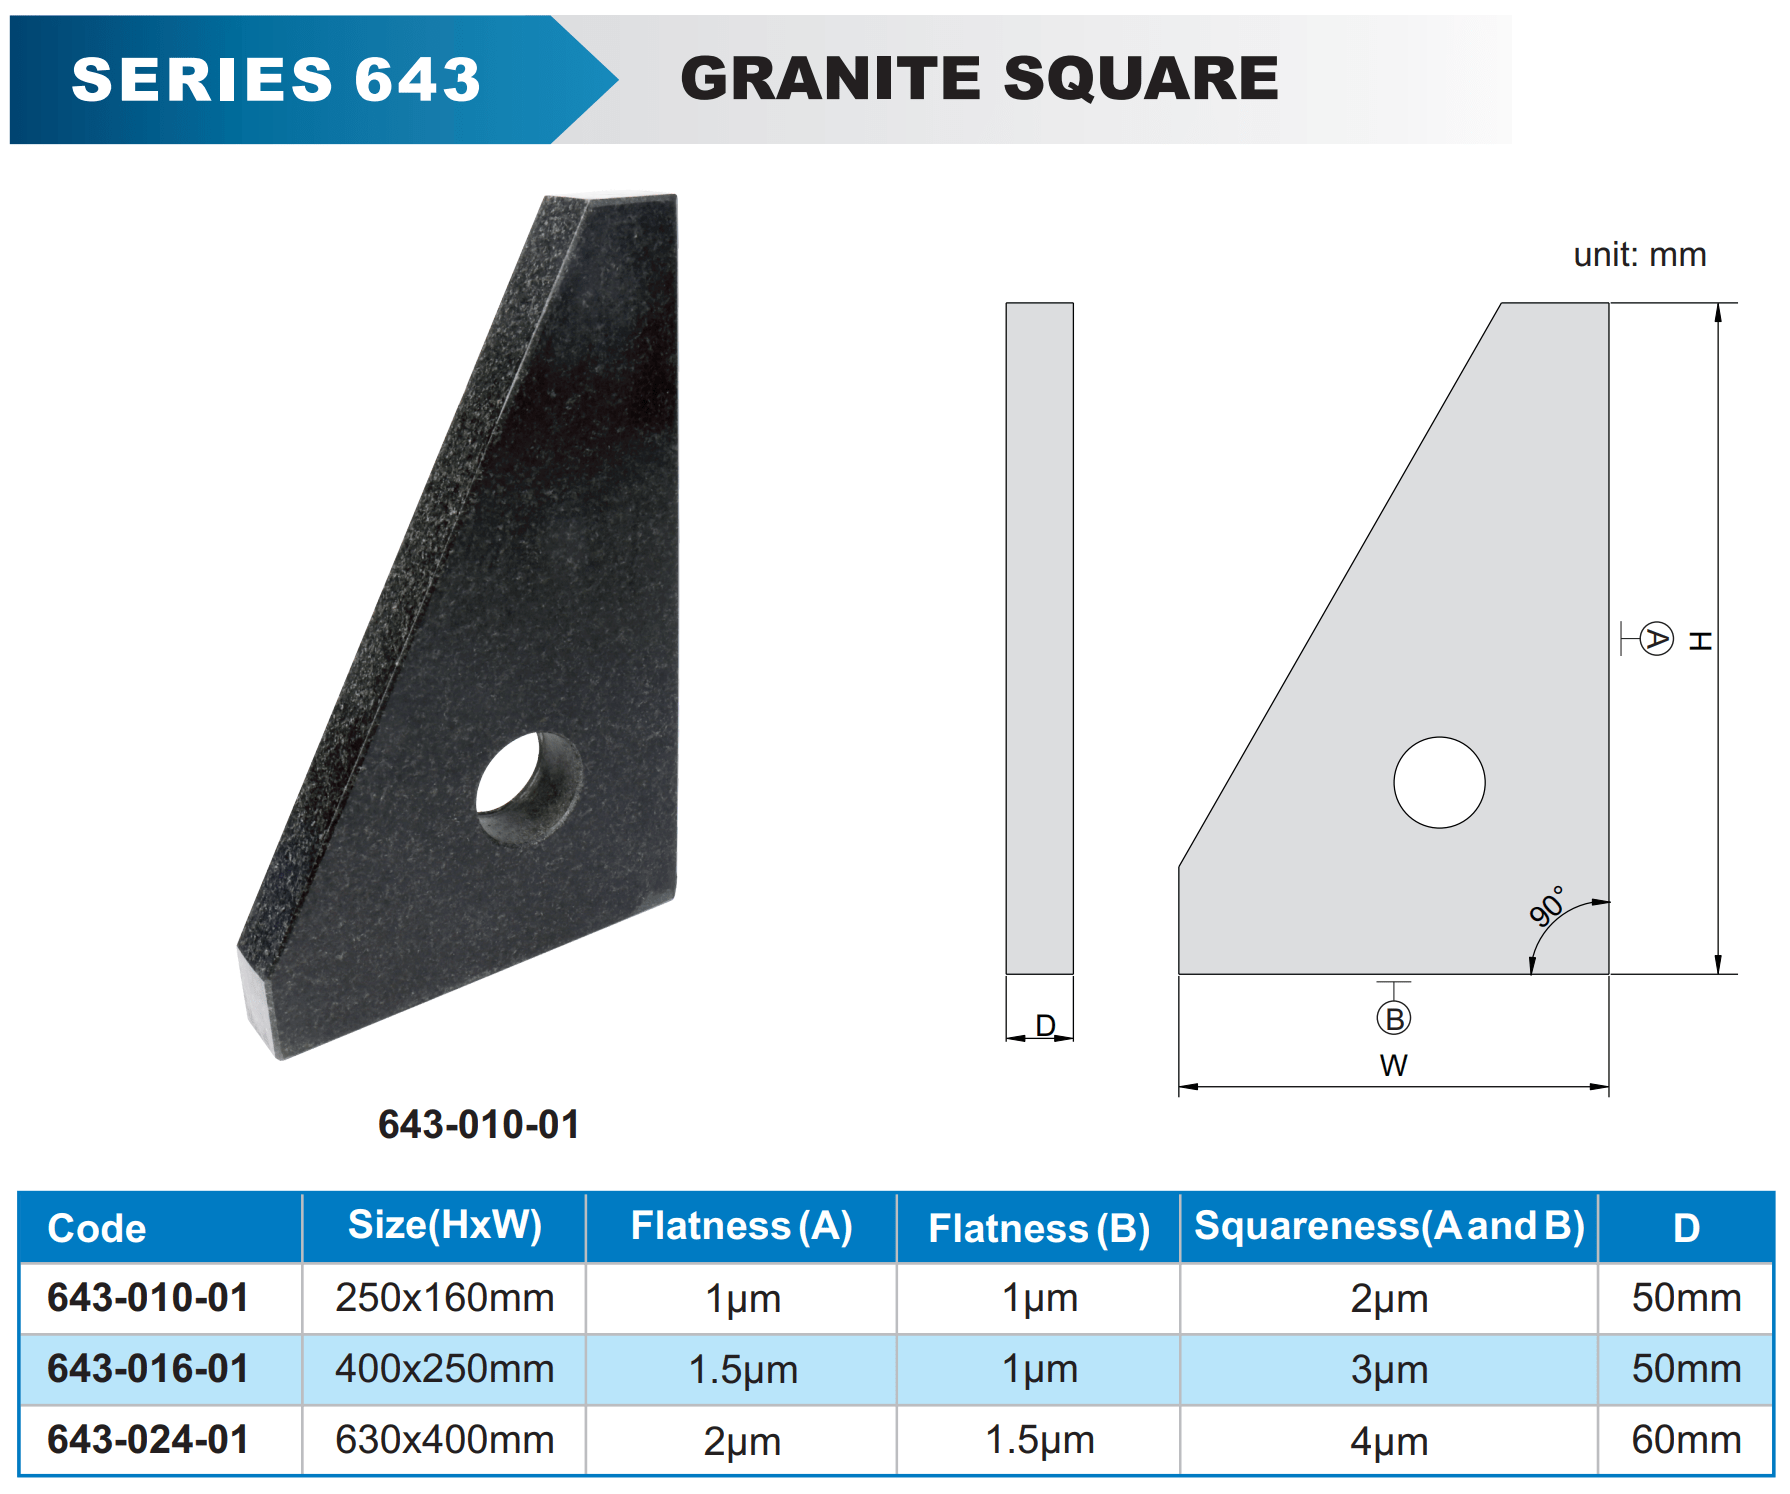
Granite Square 630 x 400mm
SERIES 643
SERIES 643
A Granite Square is a precision measuring tool used for checking the squareness and flatness of objects, ensuring that they are at a precise 90-degree angle. Made from high-quality granite, these squares are valued for their stability, durability, and resistance to corrosion, making them ideal for high-accuracy work in metrology, inspection, and machining environments.
Benefits:
- Non-Magnetic: Being non-magnetic, granite squares do not attract metal chips, which can help maintain a clean measuring surface.
- Long-lasting: Due to their hardness and resistance to wear, they provide a longer service life compared to metal squares.
Overall, granite squares are essential tools in precision measurement, providing consistent and reliable results in demanding environments where accuracy is paramount.
Types and Applications:
- Types: Granite squares are available in different shapes, including L-squares, straight edge squares, and tri-squares. Each type serves specific purposes depending on the nature of the workpiece.
- Applications: Commonly used for inspecting machine parts, aligning equipment, setting up machinery, and calibrating other tools. They are widely utilized in industries such as manufacturing, aerospace, automotive, and metalworking.
Key Features:
- Material: Granite squares are typically made from black granite, which is preferred due to its high density, hardness, and low porosity. Granite is naturally resistant to rust and corrosion and has excellent wear resistance, making it ideal for precision measurement.
- Precision: These squares are ground and lapped to a very high level of accuracy, often to tolerances within micrometers. They are commonly used in settings where high-precision measurements are required.
- Stability: Granite has low thermal expansion, meaning it remains dimensionally stable even in varying temperatures, which is crucial for maintaining accuracy.
- Surface Finish: The measuring surfaces are polished to achieve a smooth and flat finish, reducing the risk of wear and ensuring consistent accuracy over time.


